How to Make Hanami Dango (Tri-Colored Dango) From Scratch-Japanese Taste

How to Make Hanami Dango (Tri-Colored Dango) From Scratch

by Ayako Kidokoro

Gluten-Free Spring Traditional Japanese Sweets Wagashi Vegan Vegetarian

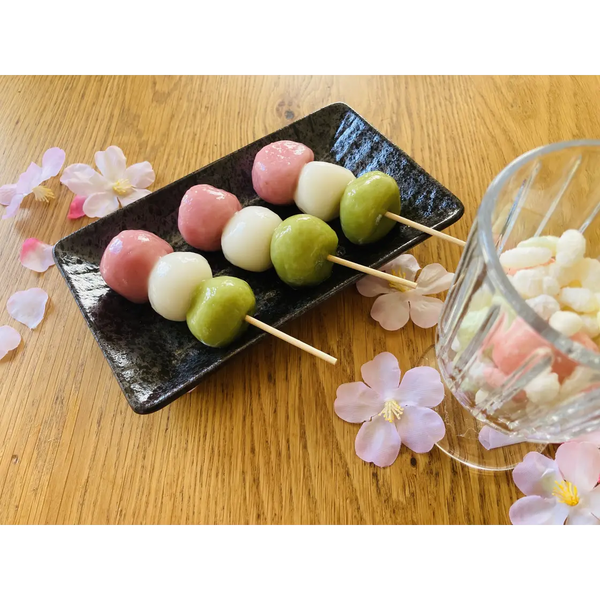
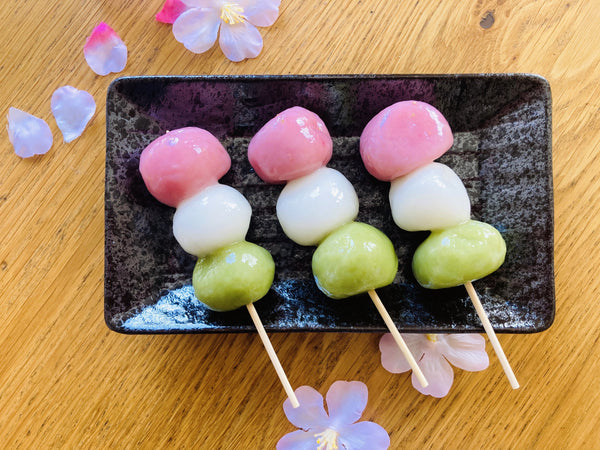
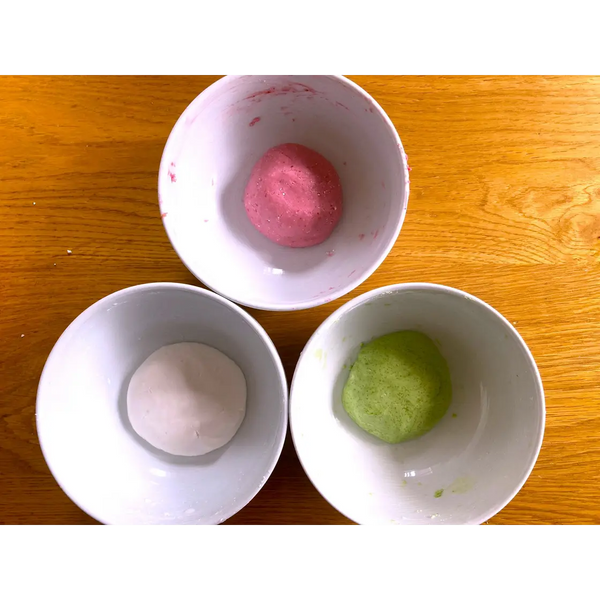
“Hanami Dango” is a special type of Japanese dango, also known as tri-colored dango. The dumplings are colored pink, white, and green and are served on a skewer. Hanami dango is a traditional Japanese sweet that represents the coming of spring.

Japanese people are fascinated with Sakura because they are in full bloom for only a short period of time, so Japanese love getting together and having picnics under the sakura trees during spring.

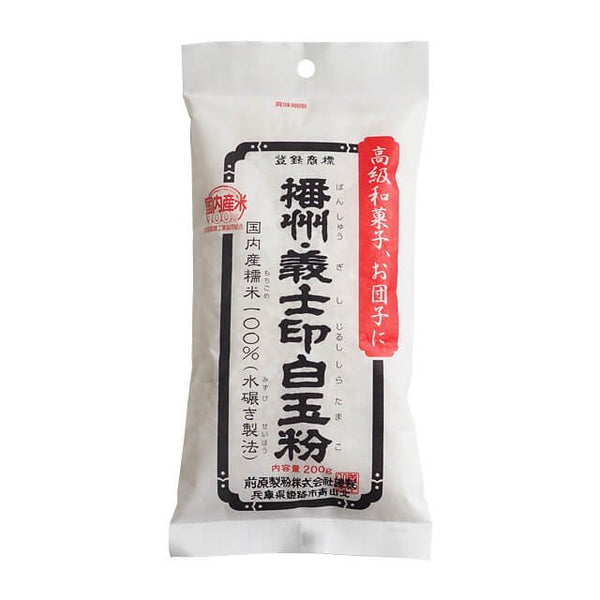
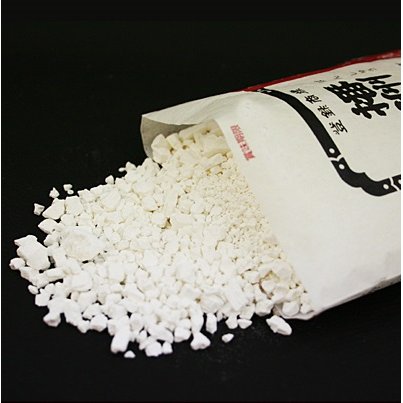
There are many different kinds of dango in Japan, but hanami dango in particular has the texture of sticky mochi (rice cake) but is typically a bit firmer and springier than mochi. We are using Shiratamako flour for our recipe because it gives the dango the perfect chewy texture and is easier to find outside of Japan than other kinds of dango flour.

The taste of hanami dango is chewy, tender, and slightly sweet. Traditionally, hanami dango is flavored with Sakura cherry blossoms for pink, and Yomogi, or mugwort for green. The white-colored dango is left plain. Each dango has a different flavor, so you can enjoy a different flavor experience with each bite.

Hanami dango is also called Sanshoku Dango, which means three-colored dango, but we call it hanami dango during spring because Hanami translates to flower viewing in Japanese. It is one of the most iconic Spring foods in Japan.

Why are pink, white, and green chosen as the spring colors for hanami dango? There are a few theories but one of the most famous theories is that pink represents sakura, white represents white Sake (Japanese used to drink it at celebrations), and green represents Yomogi, which is harvested in spring and is said to be a sacred type of leaf.

Usually, salt-pickled Sakura and Yomogi are used to color the dango, but they are quite hard to find outside of Japan. In our recipe, we suggest using Strawberries and Matcha for coloring the dango. They are perfect substitutes for the colors, and they make the dango very tasty.

Overview

Prep time: 30 mins

Cook time: 15 mins

Total time: 45 mins

Total servings: 8

Difficulty: Easy

Ingredients
  • 180g Shiratamako Flour (divided into 3 groups of 60g)
  • 90g Sugar (divided into 3 groups of 30g)
  • 60g Strawberries
  • 1 tsp Matcha powder
  • 80cc Hot water (40cc each for white and green-colored dango)

Expert's Tip

How to Make Hanami Dango (Tri-Colored Dango) From Scratch

This glutinous rice flour is made by extracting the starch in glutinous rice. It gives the hanami dango a mild and chewy texture, which is exactly the texture you want when making it. The flour itself has a unique sweetness from the rice grains and has a smooth and fine texture. 

Instructions

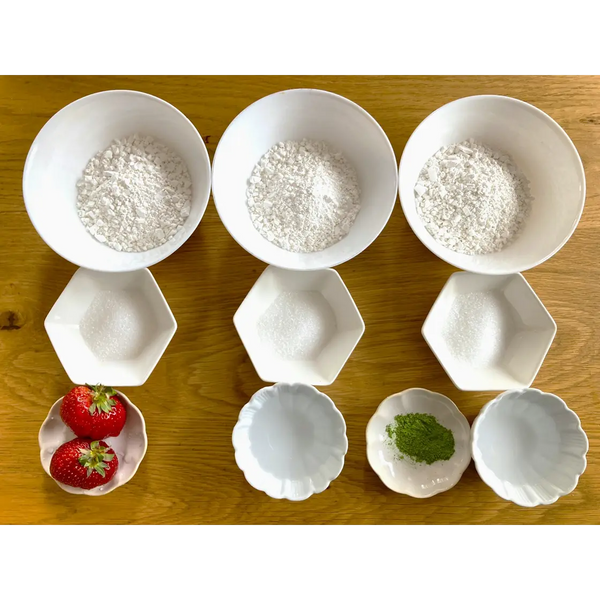
1) Gathering the Ingredients

Assemble the ingredients together and remove the stems from the strawberries.

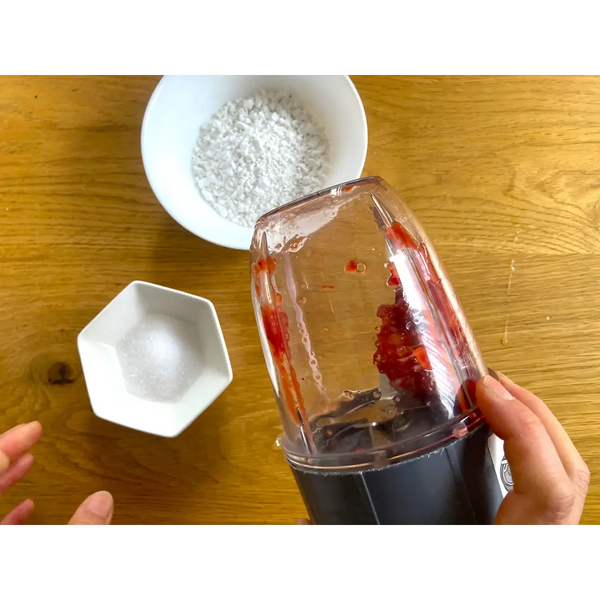
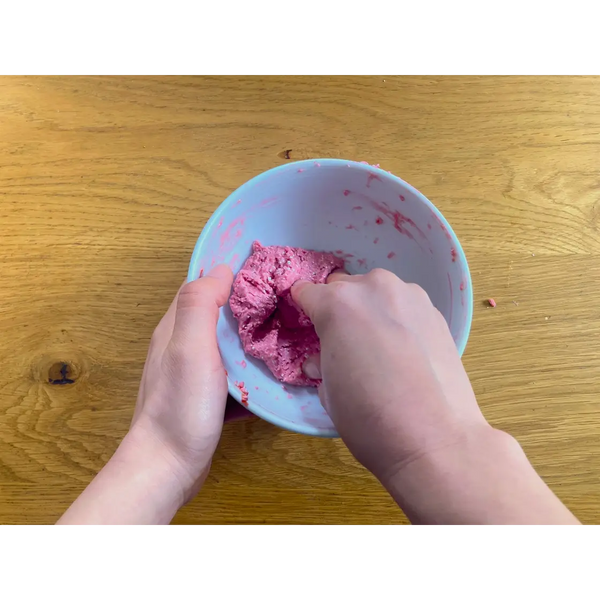
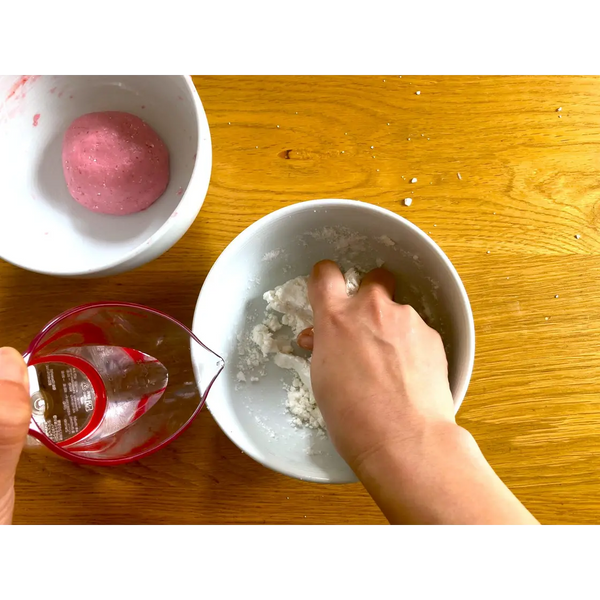
2) Making the Pink Dango

Puree the strawberries in a blender or food processor. Transfer them into a separate bowl and add 60g of Shiratamako flour, 30g of sugar, and the pureed strawberries, and then mix it together.

Use your hand to knead the dough until it comes together. Knead until everything is well incorporated and there are no lumps.

Tips: If you don’t have fresh strawberries, you can use frozen ones, just defrost them before blending them.

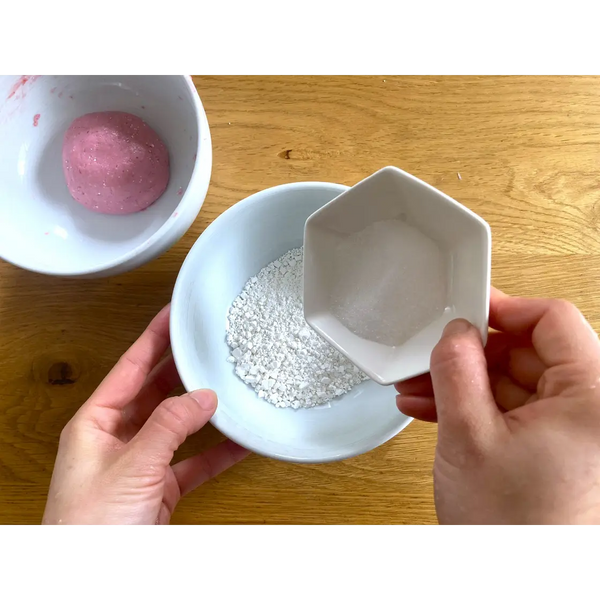
3) Making the White Dango

Same as the pink dango, add Shiratamako flour, sugar, and hot water into a bowl and mix it together.

Use your hand to knead the dough, and continue to knead it until everything is well incorporated.

Tip: If the texture is too dry and can’t be kneaded, add more hot water but little by little. It should have a firm texture at this point.

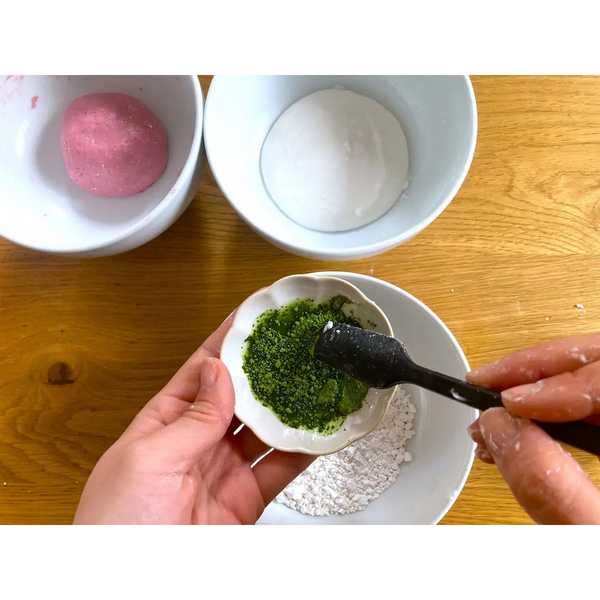
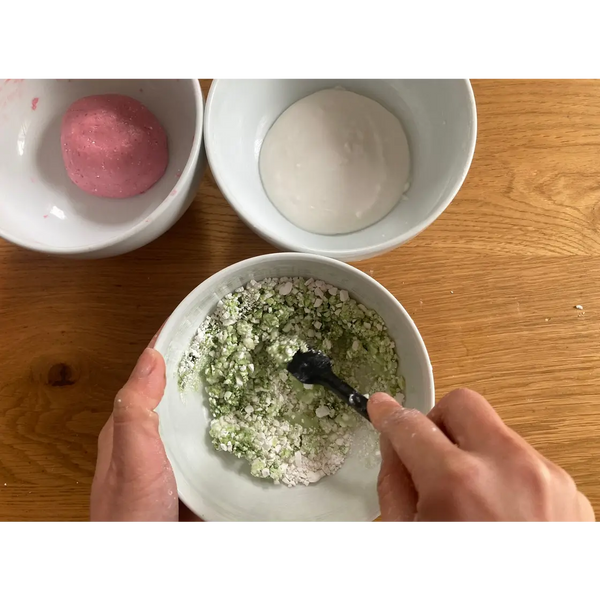
4) Making the Green Dango

Add some hot water to Matcha powder and mix it well until there are no lumps.

Same as pink and white dango, add Shiratamako flour, sugar, hot water, and matcha mixture to a bowl and mix it together. Use your hand to knead the dough until everything is well incorporated.

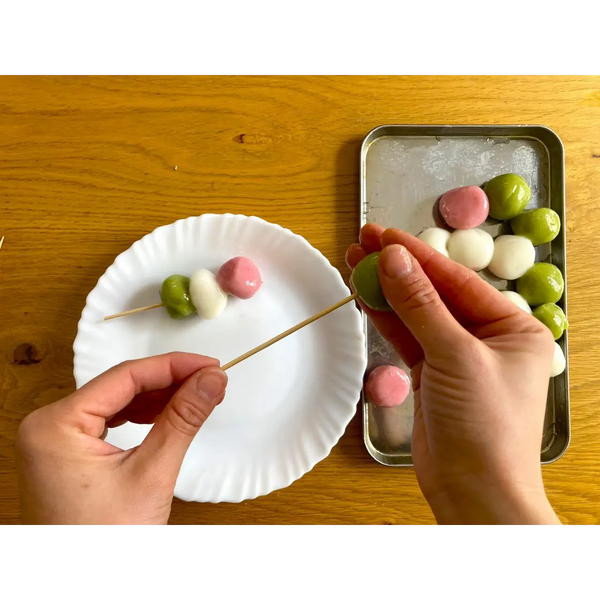
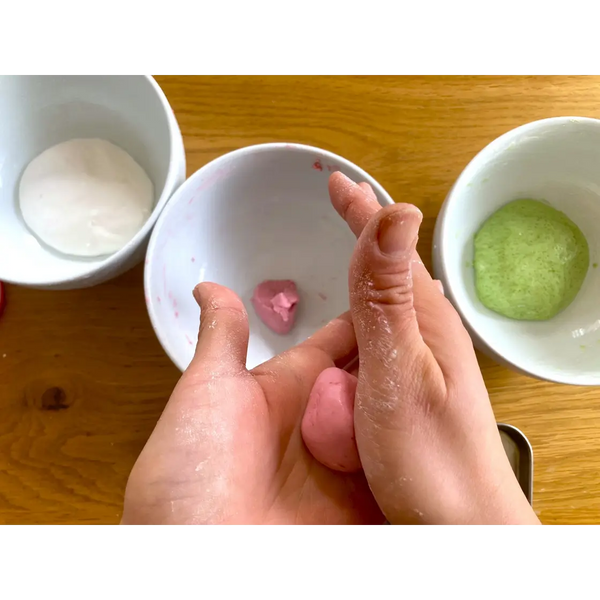
5) Shaping the Hanami Dango

Divide each color of dough into 8 equal pieces (roughly into 1 tbsp sized pieces) and shape them into balls. 

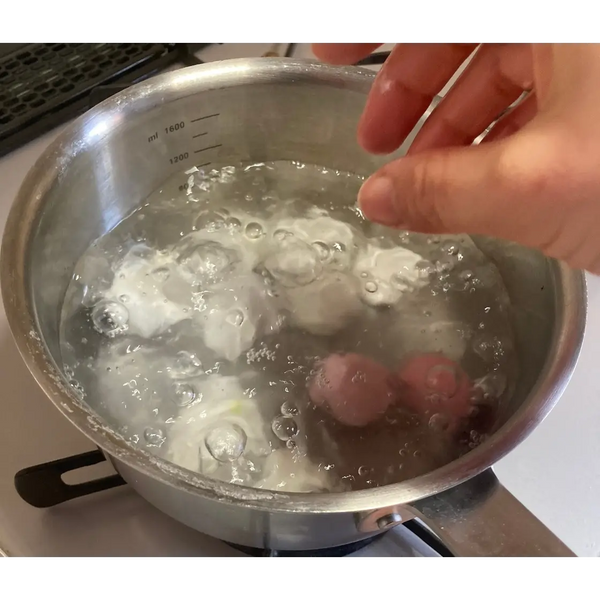
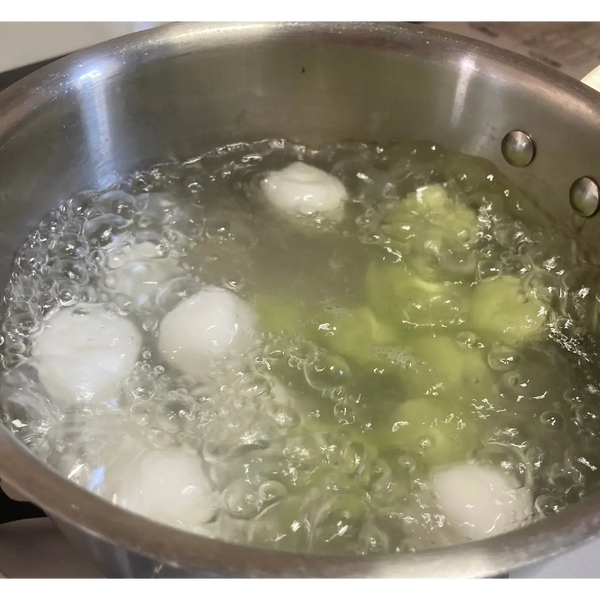
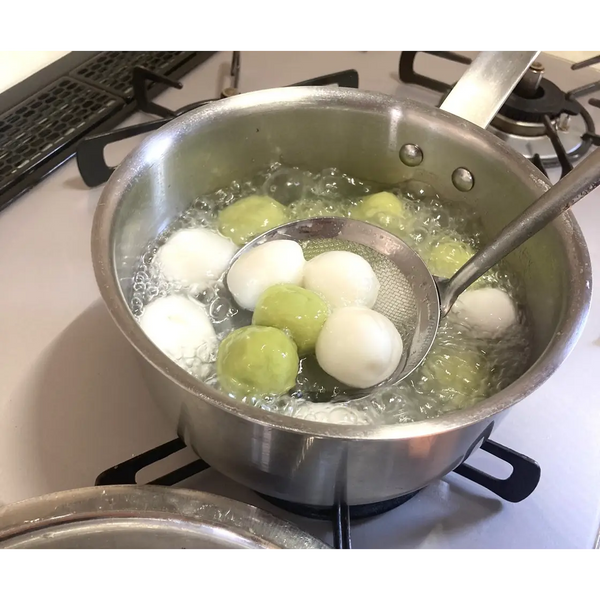
6) Boiling the Dango

Prepare an ice bath for the dango. This will be used after cooking them.

In the meantime, bring a pot of water to a boil. Once boiling, add in the dango. When the dango rise to the surface, let them cook for an additional three minutes.

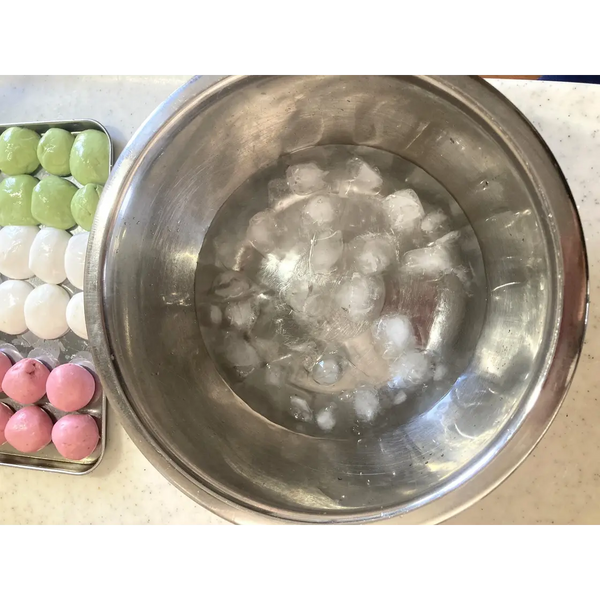
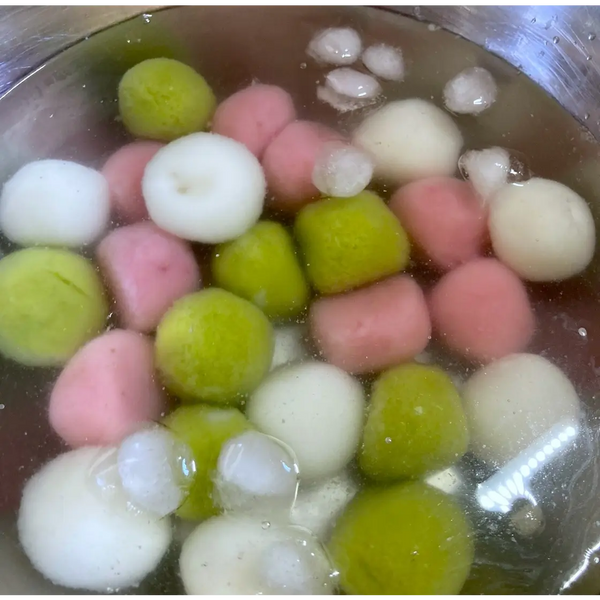
7) Cooling the Dango in an Ice Bath

Remove the dango from the pot and immediately transfer them to the ice bath. This step is what gives dango their unique texture, which is different from mochi.

8) Skewering the Hanami Dango

Once the dango are cool enough to handle, skewer them onto sticks.

We typically skewer them starting from green at the bottom, white, and then pink. Once skewered, they are ready to serve!

Tip: It is best to serve hanami dango immediately. If it is not possible, you can keep them covered at room temperature for up to 2 days.

Recommended products for this recipe

1 comment

  • Thank you!

    Jacob,


Leave a comment

Please note, comments must be approved before they are published