Large selection of high-quality products

🚚 Free US shipping on orders $150+

Save more by signing in to your account

You're now shopping in
United States
United States
USD $
    How To Make Tsukimi Dango (Moon-Viewing Dango) At Home

    How To Make Tsukimi Dango (Moon-Viewing Dango) At Home

    by Megumi Moriya

    Dessert Fall Wagashi Dango Rice dumpling Japanese Sweets Traditional Easy

    There is an event called “Otsukimi” in Japan where people enjoy viewing the bright and beautiful moon. Tsuki means moon, while mi means viewing, and the full moon reminds Japanese people that autumn has come. 

    The essential food for the Otsukimi is “Tsukimi Dango” which is a dessert made of mochi-type round-shaped dumplings. Japanese people offer this Tsukimi Dango to the gods to show that they are grateful for the harvest and fruitfulness as the Otsukimi event is just around the harvest season. It is said that this custom was established in the Edo period.

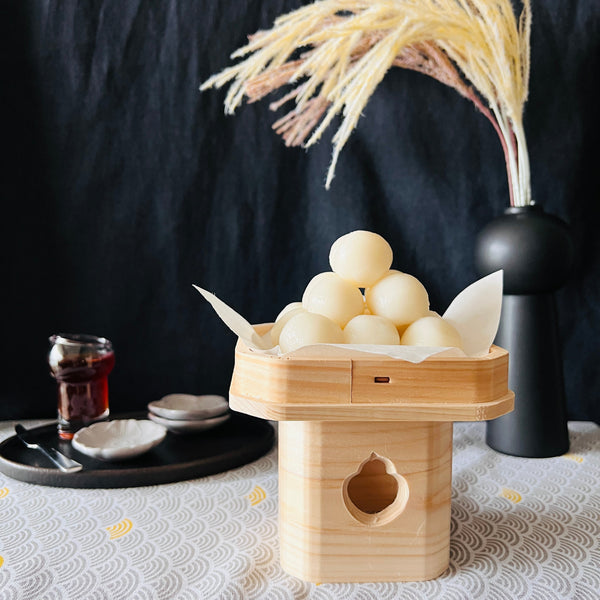
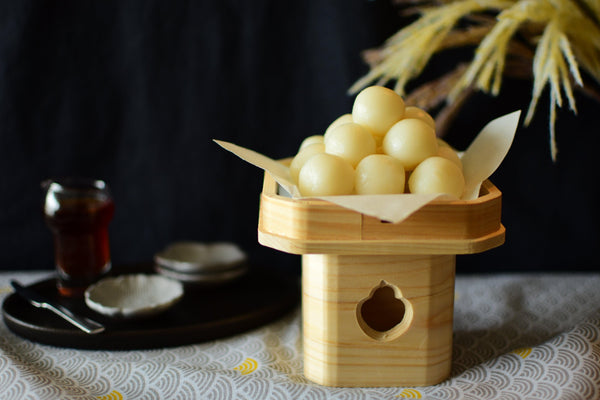
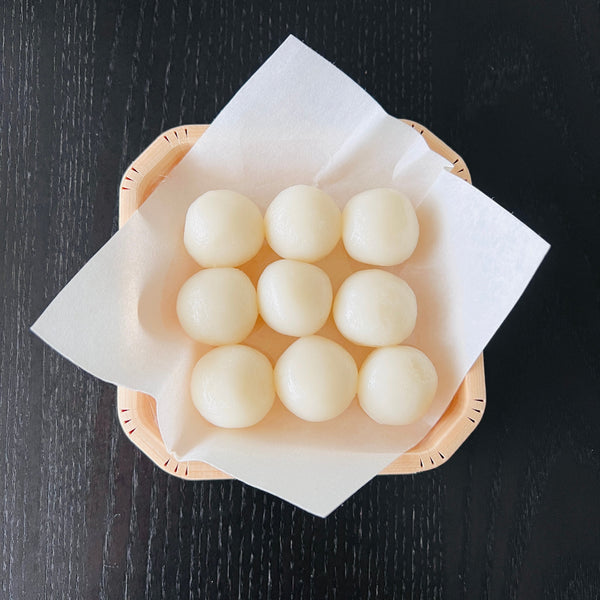
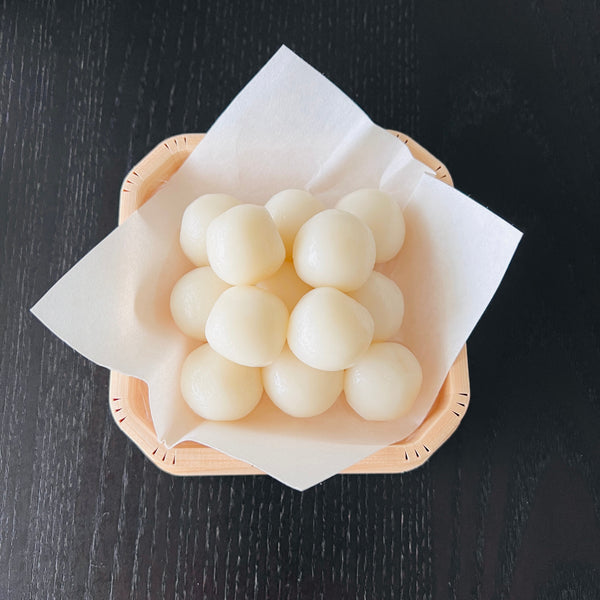
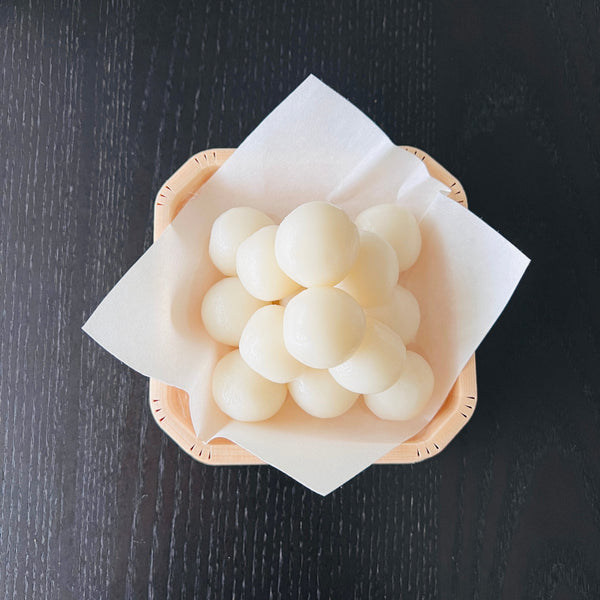
    While Tsukimi Dango is very easy to make at home, the importance lies in the presentation. Tsukimi Dango should be displayed like a pyramid and the number of Dango should be 15 portions. We will show you in detail how to pile the Tsukimi Dango in this recipe.

    If you’ve seen Tsukimi Dango before, it was probably served on a wooden stand. This wooden stand is called “Sanpou” which is a traditional tool to present offerings to the gods. Sanpou has holes that face in three directions. When offering something on a sanpou, to the altar, the side without a hole should face the altar. In the case of Otsukimi, the side that does not have a hole should face the moon. Where you decide to place the sanpou should be somewhere with a beautiful view of the moon. This is the way in which tsukimi dango is typically and traditionally enjoyed, but of course, you can enjoy Otsukimi in YOUR style!

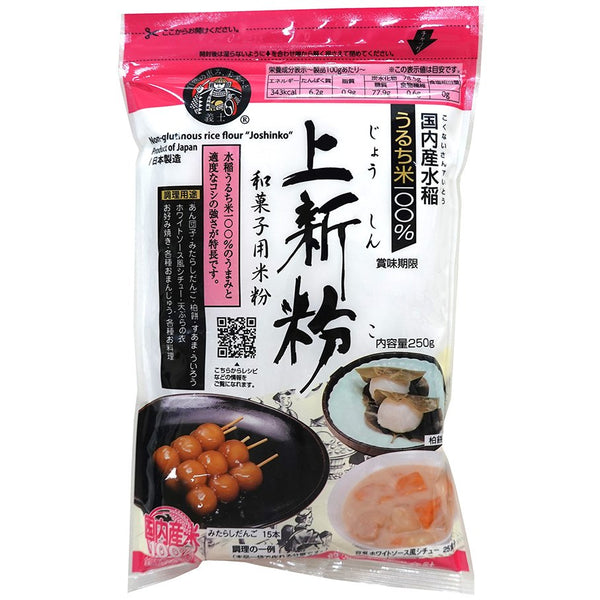
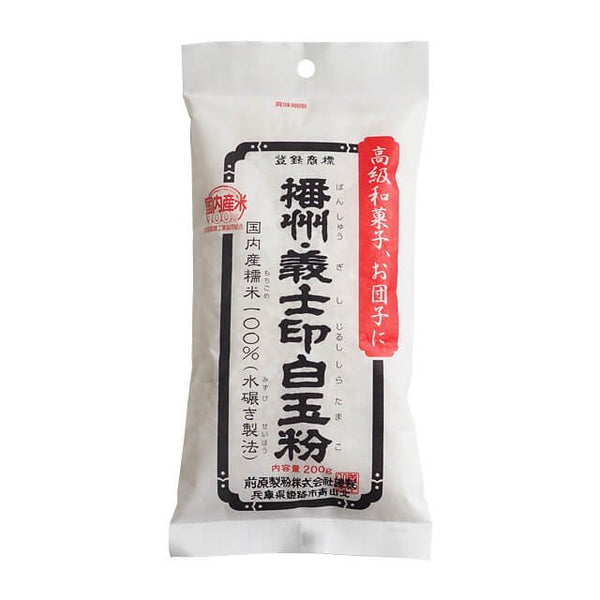
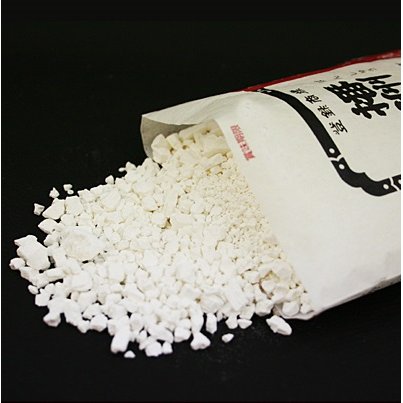
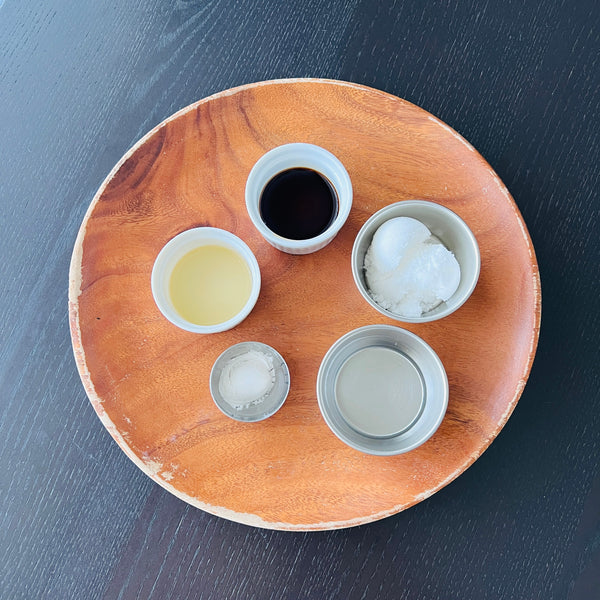
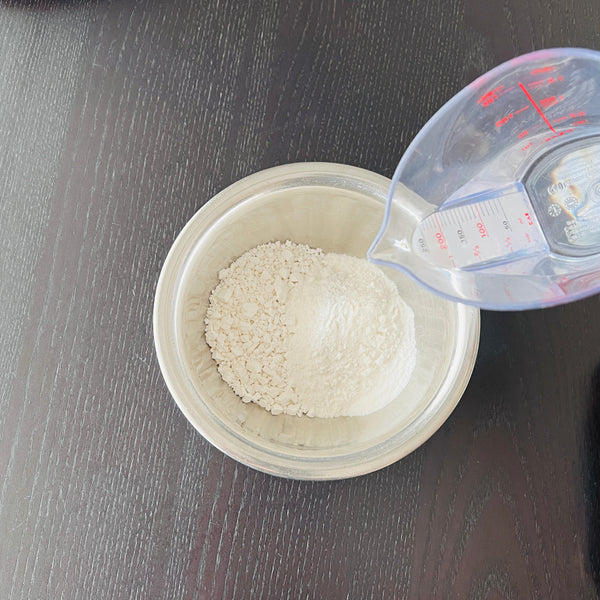
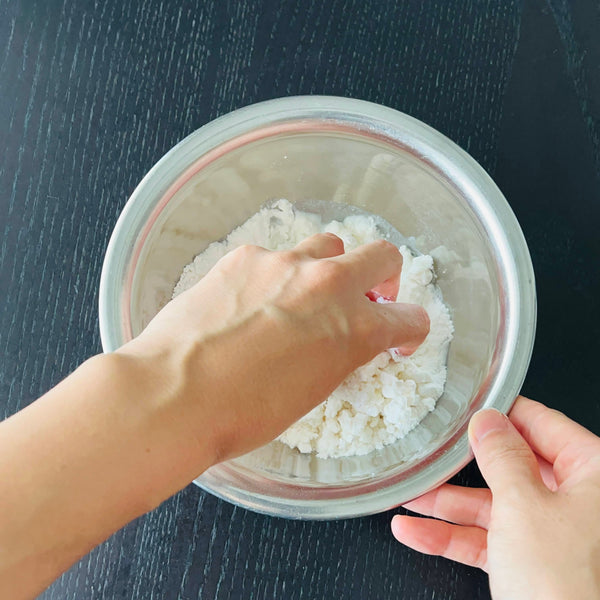
    Now that you know a little bit about the background of Otsukimi and how to display Tsukimi Dango, let’s talk about how to make it at home. The main ingredient of Tsukimi Dango is “Joshinko” which is a type of rice flour made from Uruchi-mai (the most popular type of rice in Japan). The main characteristic of Joshinko is that it gives dango a firmer and harder texture. In order to combat this and enjoy mochi softer texture, we will add “Shiratamako” so that the texture of the dango becomes soft, smooth, and chewy. If you can’t find Joshinko or Shiratamako in your local Asian or Japanese supermarket, you can find both of them on our website.

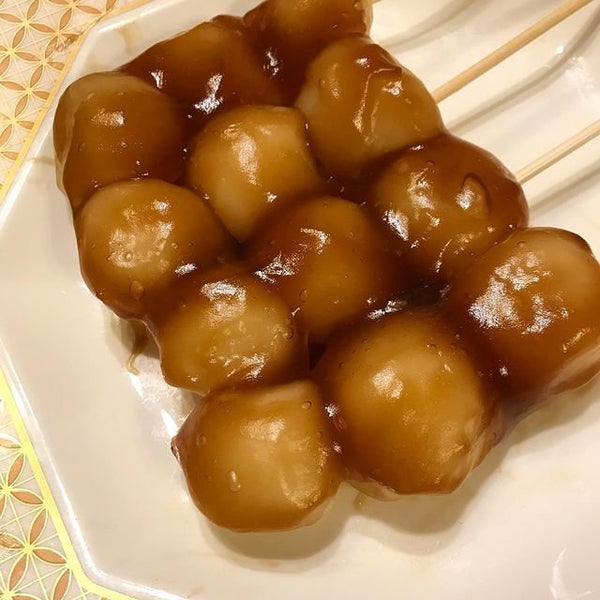
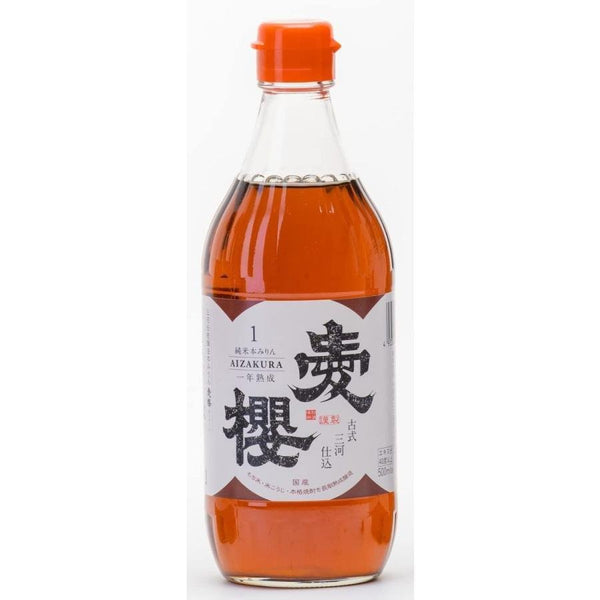
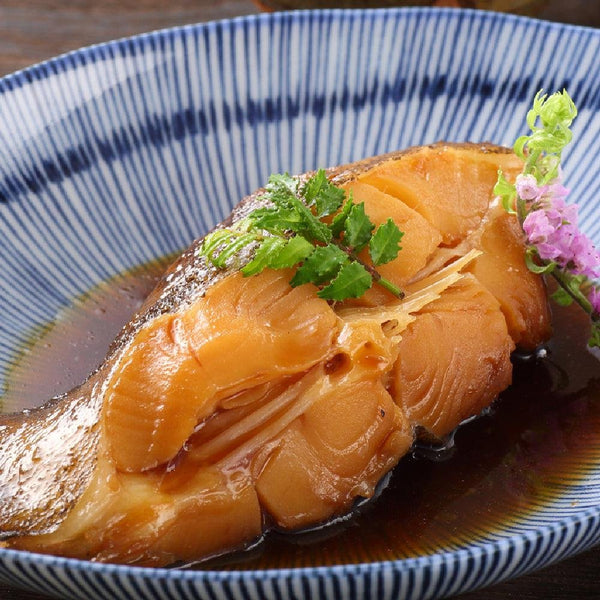
    But wait, how is tsukimi dango eaten? To make tsukimi dango even more delicious, we recommend you eat it with Mitarashi sauce. This will definitely upgrade the taste of Tsukimi Dango. Mitarashi sauce is made mainly from shoyu, but it also includes sugar and mirin, so you can enjoy the balance of sweetness and saltiness at the same time. There is no doubt that you will become addicted to the combination of chewy dango and sweet-salty mitarashi sauce! Stay tuned to learn how to make this seasonal Japanese dessert at home, and how to properly serve it. 

    Let us know in the comments below if you tried this recipe out for yourself and how it was!

    Overview

    Prep time: 20 mins

    Cook time: 15 mins

    Total time: 35 mins

    Total servings: 15

    Difficulty: Easy

    Ingredients
    • 50g Joshinko (non-glutinous rice flour)
    • 50g Shiratamako (glutinous rice flour)
    • 80ml Water (*may need to adjust depending on the temperature and humidity of your kitchen)
    • 1 Tbsp Shoyu (for mitarashi sauce)
    • 1 Tbsp Mirin (for mitarashi sauce)
    • 3 Tbsp Sugar (for mitarashi sauce)
    • 3 Tbsp Water (for mitarashi sauce)
    • 1 tsp Starch (for mitarashi sauce)

    Expert's Tip

    Sori Yanagi Stainless Steel Skimmer Spoon 298mm

    Don’t have a skimmer spoon in your kitchen? Then you should make this skimmer spoon your cooking partner! Skimmer spoons are useful when you scoop the ingredients out from water or soup. Not only does this skimmer spoon work great for scooping, but it also has a beautiful seamless design and is even multifunctional! Use it to mash vegetables, strain miso paste, and more!

    Instructions

    dango ingredients mitarashi sauce ingredients
    1) Gathering the Ingredients
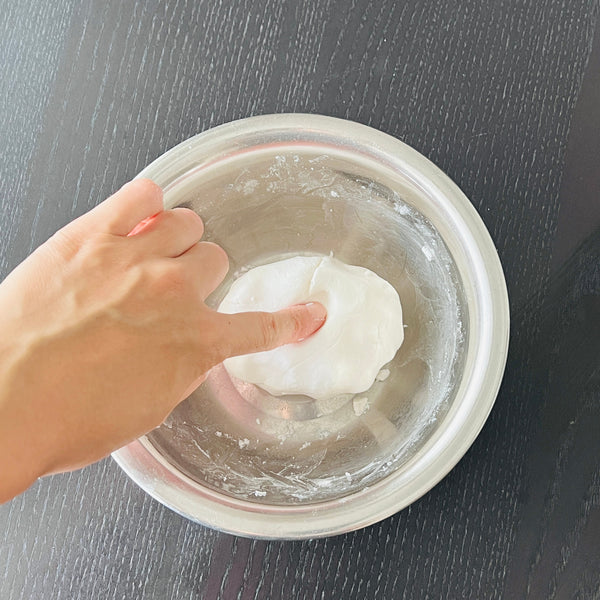
    Gather the ingredients together. 

    (Note: the first picture is of the ingredients for the tsukimi dango while the second picture is of the ingredients for the mitarashi sauce.) 

    dango flour in a bowl and adding water little by little mixing the dango dough with hands dango dough, with earlobe texture
    2) Making the Dango

    Add Joshinko and Shiratamako flours into a bowl. Pour the water little by little into the flour and mix it with your hand until the texture of the dough becomes soft like an earlobe.

    Check the texture and if it is still crumbly, add a small amount of water (one teaspoon at a time) until it reaches the desired texture. Knead for about 2-3 minutes. 

    Note: Depending on the temperature and humidity, you may need to adjust the amount of water. 

    shaping the dango
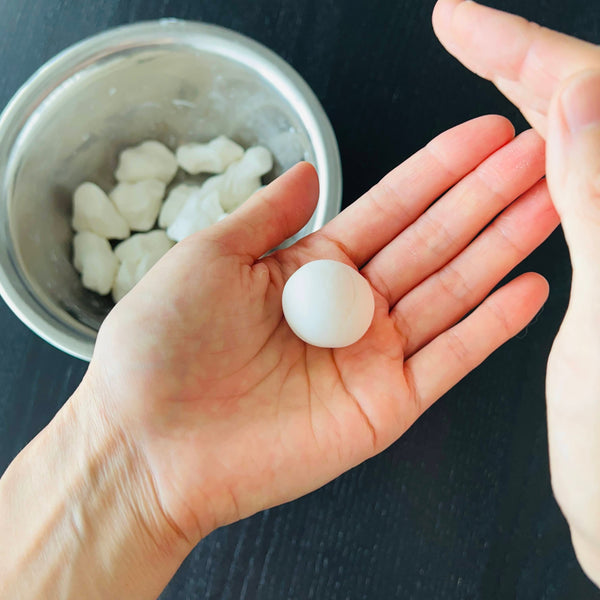
    3) Portioning & Shaping the Dango

    Divide the dango dough into 15 portions (each dango should be about 11-12g), and shape them into balls.

    boiling the dango cooked dango floating to the surface cold ice bath
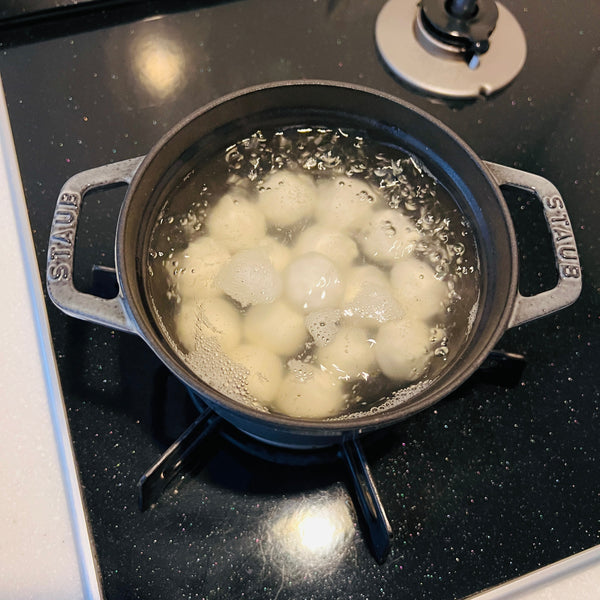
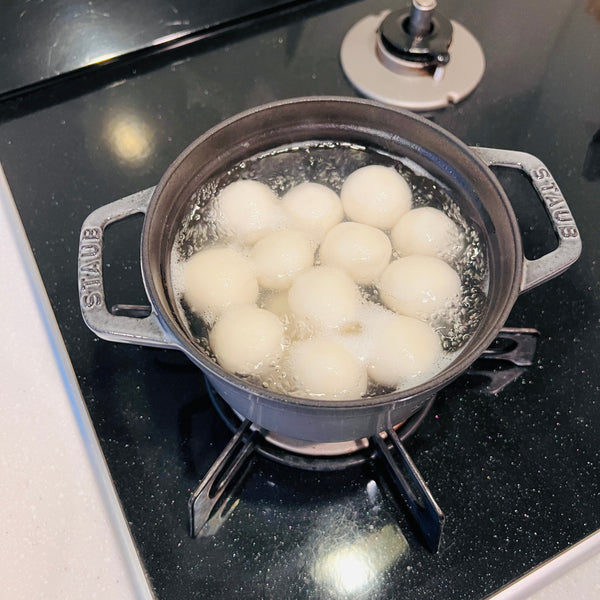
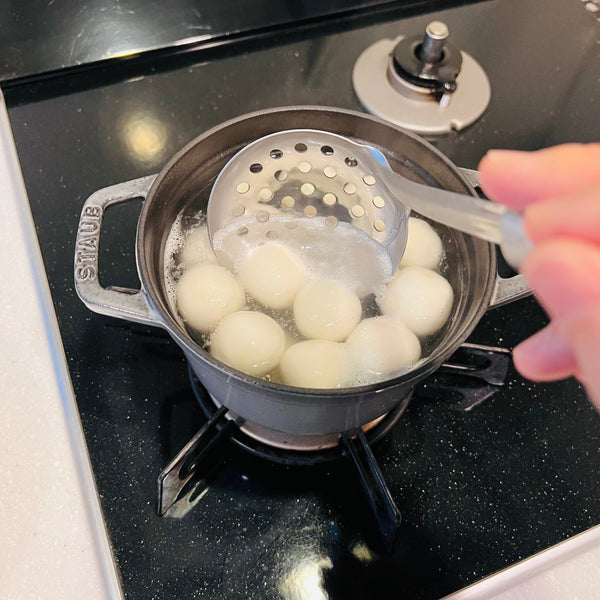
    4) Cooking the Dango

    In a small pot, bring water to a boil and cook the dango.

    At first, they will immediately sink to the bottom of the pot, but eventually, they will float to the surface.

    Once they float to the surface, boil them for about 2 minutes. While the dango are boiling, prepare a bowl of cold water and ice. 


    Taking the dango out of the boiling water with a skimmer spoon Cooling the dango in an ice bath Transfering cool and drained dango to a separate tray Cool and drained dango, on a tray
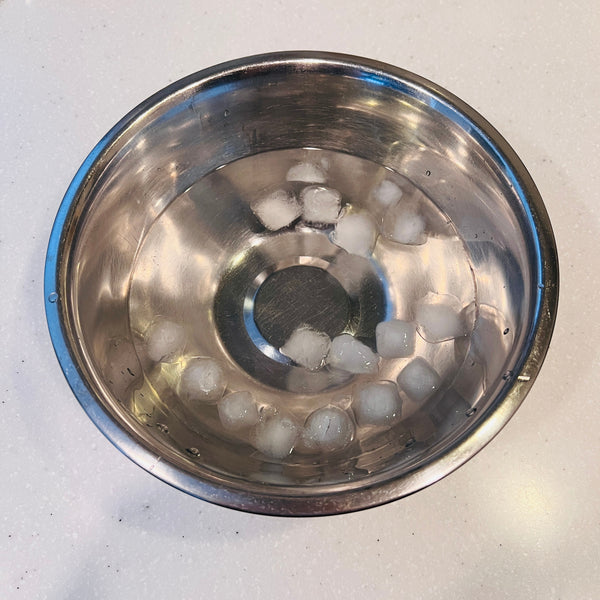
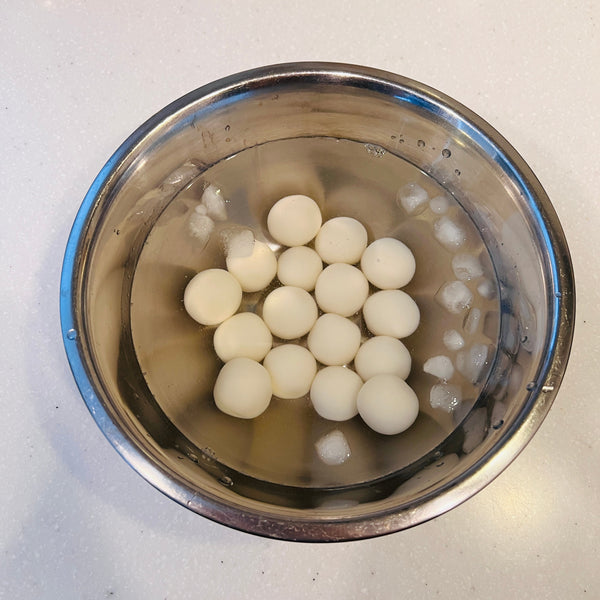
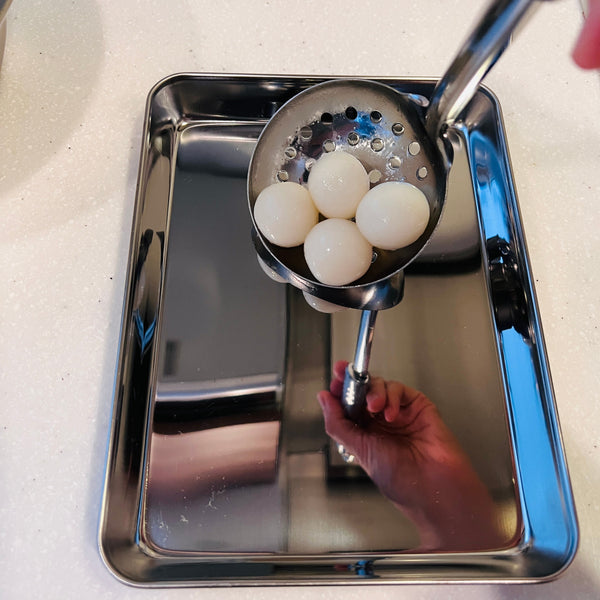
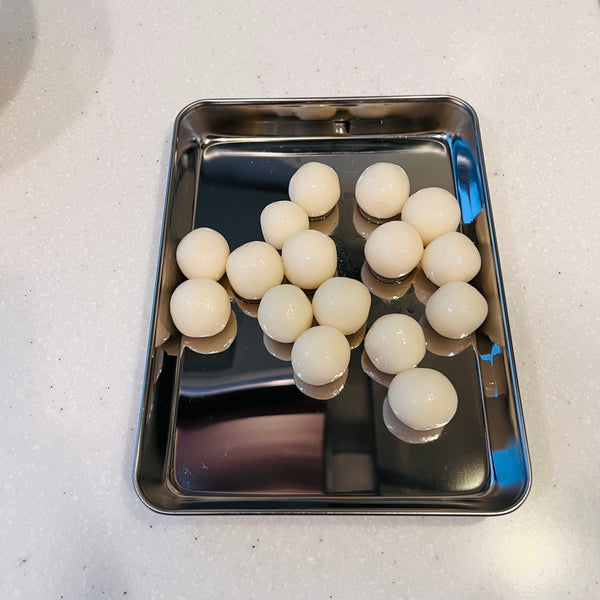
    5) Cooling the Dango

    Scoop the dango from the boiling water with a skimmer spoon and transfer them into the bowl of cold water that you prepared earlier. This will immediately stop the dango from cooking further.

    Once the dango are cool to touch, drain and transfer them to a plate.

    Tip: It is better not to use a colander to drain the boiling water, because the pattern of the colander will appear on the dango. If you don’t have a skimmer spoon, you can use a large spoon or ladle to scoop the dango.

    Mixing the mitarashi sauce ingredients Adding the sugar to the mitarashi sauce Adding the starch slurry Mixing the sauce ingredients together Finished mitarashi sauce Spooning sauce over the dango
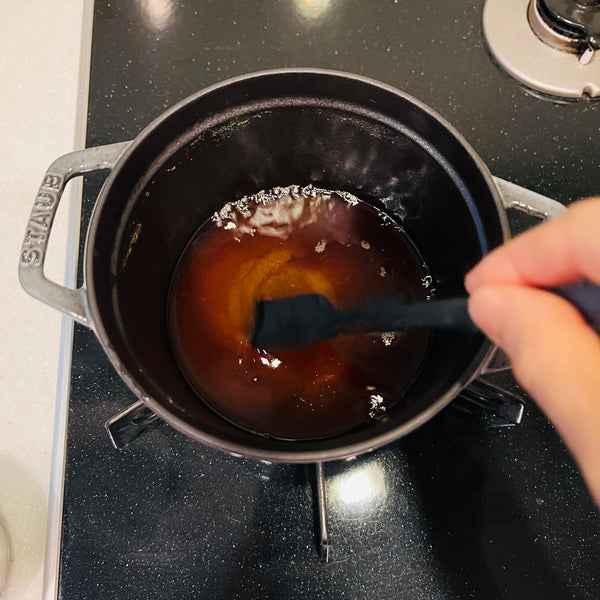
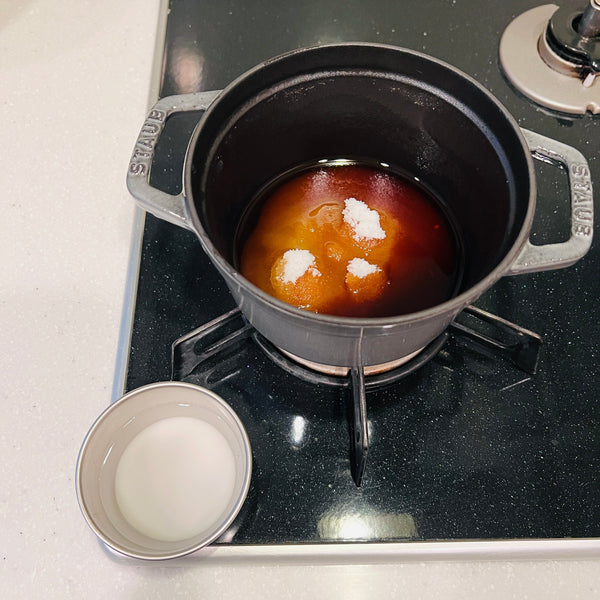
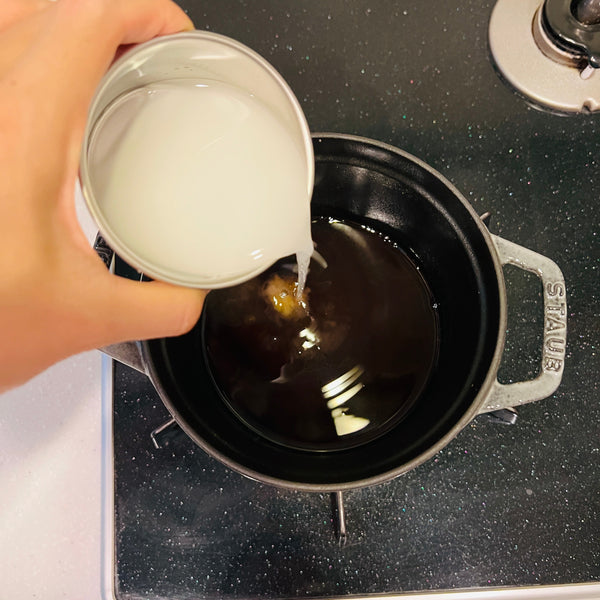
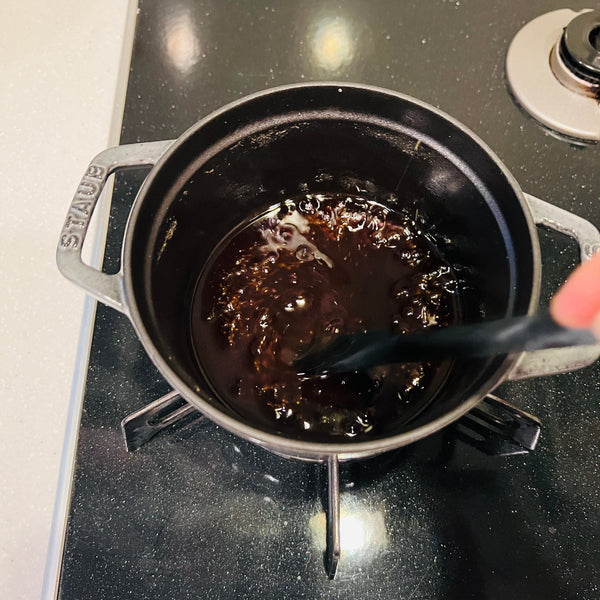
    6) Making the Mitarashi Sauce

    In another small pot, add in the shoyu, mirin, and sugar. Mix them well and heat the pot over medium heat. Once the sugar has melted, in the water and starch slurry. Stir the mitarashi sauce mixture thoroughly to ensure that the slurry incorporates evenly into the sauce. Once the sauce has thickened to your liking, take it off the heat and set it aside.

    Dip or pour the mitarashi sauce over the tsukimi dango after displaying them.

    Placing 9 dango as the base Stacking an additional 4 dango Placing 2 dango on top Tsukimi dango tower, from another angle
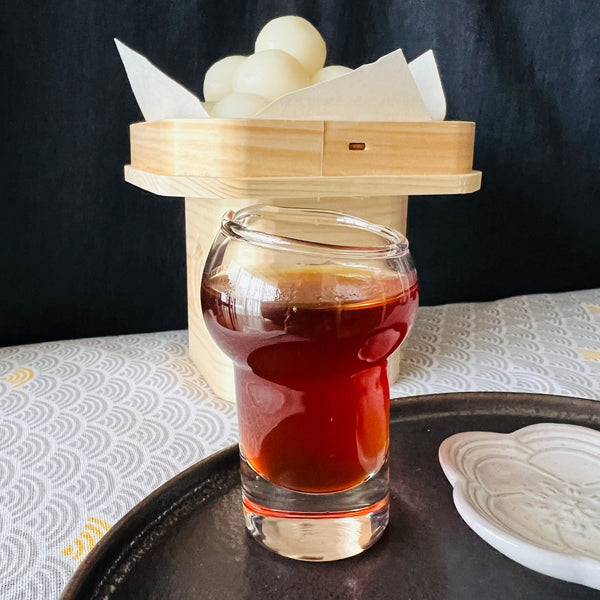
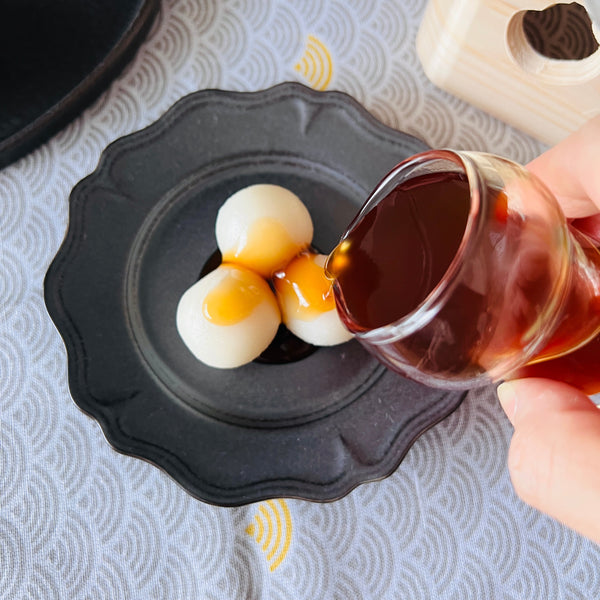
    7) Displaying Tsukimi Dango

    If you want to properly display your tsukimi dango on a sanpou or plate, we’ll teach you how to in this section. 

    Place 9 portions on the very bottom. Layer 4 portions on the second layer. Put 2 portions on the top.

    There should be 15 dango in total for making the display. 

    decorated tsukimi dango display
    8) How to Decorate the Tsukimi Dango Display Even More

    It is said that Susuki (pampas grass), which resembles ears of rice and has a talisman effect, began to be used to display together. You can arrange pampas grass alone or with autumn flowers in a vase as well.

    Recommended products for this recipe

    0 comments


    Leave a comment

    Please note, comments must be approved before they are published